Winterizing your RV travel trailer is more than just a seasonal chore it’s an essential step to protect your investment. Freezing temperatures can cause pipes to burst, damage your water system, and even ruin interior materials if left unchecked. Proper winterization ensures your RV stays in top condition, saving you money and stress in the long run.
Last winter, John from Ohio saved $1,200 in repairs by properly winterizing his travel trailer before the first freeze hit. In this guide, we’ll break down everything you need to know, from the core components to step-by-step instructions, comparison options, and expert tips.
Disclaimer: The prices discussed in this blog are for informational purposes only and are not official rates from Privacy RV.
Short Answer: How to Winterize a RV Travel Trailer
Winterizing a RV travel trailer involves draining all water from the system, protecting plumbing lines, adding RV-specific antifreeze, and prepping the interior and exterior for cold weather. This prevents frozen pipes, mold growth, and structural damage.
Quick Winterization Checklist for Visual Learners:
- Drain freshwater, gray, and black tanks
- Add RV antifreeze to plumbing
- Insulate pipes and faucets
- Clean interior, remove perishables, and ventilate
- Cover vents, seals, and roof
By taking these steps, you ensure your RV remains safe and functional, even after months of storage in freezing temperatures.
Why You Need to Winterize Your RV Travel Trailer
Skipping winterization can have costly consequences:
- Burst pipes and tanks: Frozen water expands, leading to cracked plumbing.
- Water damage: Residual water can seep into cabinetry and flooring.
- Mold and mildew: Moisture left inside encourages mold growth.
- Insulation damage: Freeze-thaw cycles weaken seals and insulation.
Consider this: a family in Minnesota lost their entire freshwater system after neglecting winterization. Repairs alone cost over $2,000, not including downtime and inconvenience. Even in areas with mild winters, protecting your RV from sudden cold snaps is crucial.
Winterizing is an investment in your RV’s longevity. Proper preparation avoids unexpected expenses and preserves resale value.
Core Components of Winterizing a RV Travel Trailer
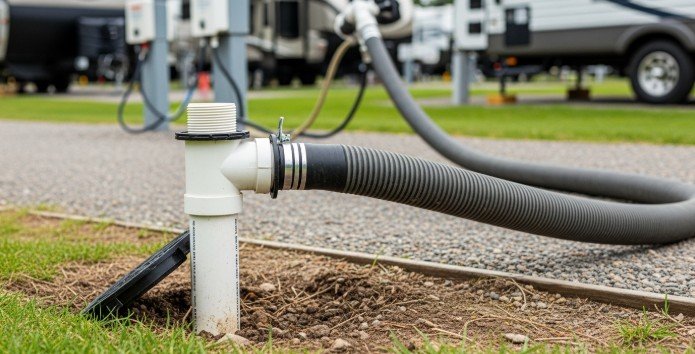
Water System
The water system is the most vulnerable during winter. Proper care involves:
- Draining tanks: Empty freshwater, gray, and black tanks completely.
- Adding antifreeze: Use RV-specific non-toxic antifreeze in all water lines.
- Climate considerations: In warmer climates, minimal antifreeze may suffice; in colder regions, extra attention is required.
Pro Tip: Always pump antifreeze through your water lines to ensure every faucet is protected.
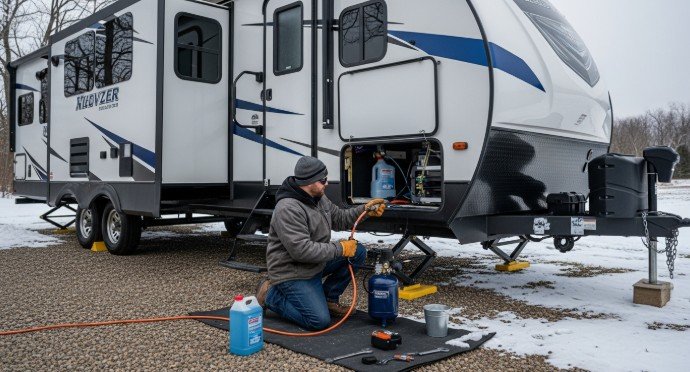
Plumbing Lines and Faucets
Pipes, faucets, and water connections need extra protection:
- Insulate exposed pipes using foam tubing or pipe sleeves.
- Install faucet covers for outdoor taps.
- Water heater bypass prevents antifreeze from filling your heater unnecessarily.
Real-life example: Many owners recommend foam pipe insulation it’s inexpensive, easy to install, and prevents frozen pipes even in -10°F conditions.
Appliances & Electrical Systems
Winter can wreak havoc on appliances if not properly prepped:
- Water heater & furnace: Drain or bypass to prevent freezing and corrosion.
- Batteries: Disconnect and store in a temperature-controlled environment to extend life.
- Electrical circuits: Check for exposed wires and moisture to avoid shorts.
Exterior Protection
Your RV’s exterior is the first line of defense:
- Cover windows, vents, and roof with a fitted winter cover.
- Inspect slide-outs and seals; use seal protectants if needed.
- Be cautious of tarps improper coverage can trap moisture and cause mold.
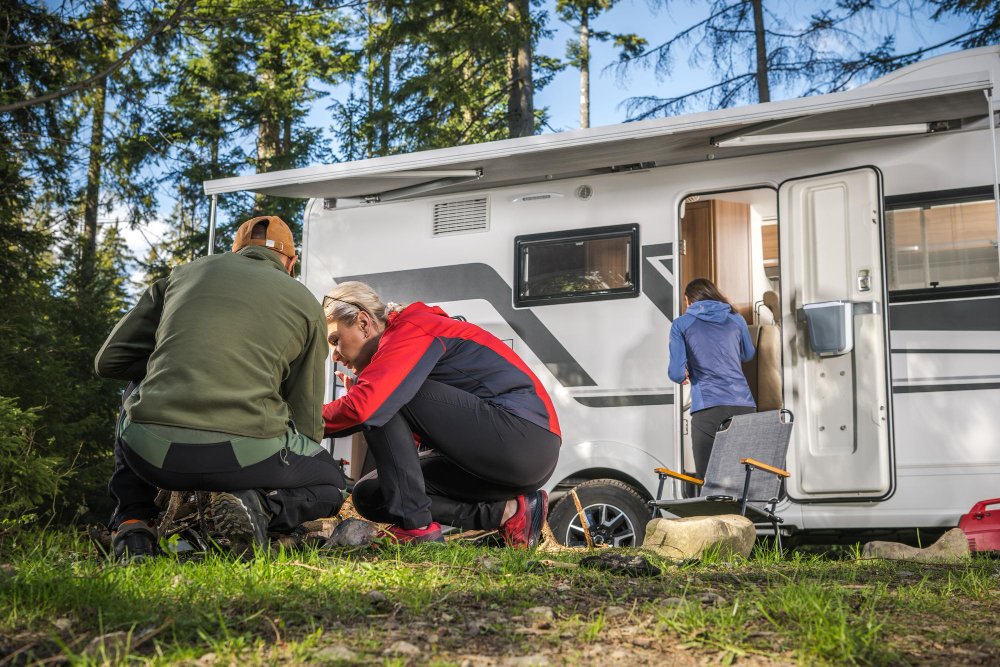
Interior Maintenance
Proper interior prep ensures no hidden winter damage:
- Remove food, perishables, and fabrics prone to mold.
- Ventilate to prevent moisture buildup.
- Use rodent-proofing strategies: steel wool in vents, peppermint oil deterrents.
Guide: How to Winterize a RV Travel Trailer
Prepare Your RV
- Disconnect utilities: electricity, water, and propane.
- Clean interior and exterior surfaces thoroughly.
- Remove valuables and perishables to prevent damage.
Drain and Flush the Water System
- Empty freshwater, gray, and black tanks completely.
- Flush systems with clean water to remove sediment.
Add RV Antifreeze
- Pump RV-specific antifreeze through the freshwater lines.
- Open faucets until pink antifreeze flows to ensure full coverage.
Protect the Plumbing Lines
- Add insulation to all visible pipes.
- Use faucet covers and bypass water heaters as needed.
Interior Prep
- Remove perishable items and clean thoroughly.
- Ventilate the RV slightly to prevent condensation buildup.
Exterior Prep
- Apply slide-out seals and check the roof for cracks or leaks.
- Install fitted RV cover to protect from snow and ice.
Battery & Electrical Maintenance
- Disconnect and remove batteries if possible.
- Store in a cool, dry place and maintain charge periodically.
Pro Hack: Schedule a mid-winter check to ensure no antifreeze leaks or pest intrusion.
Winterization Methods & Options
| Method | Cost | Pros | Cons | Best For |
|---|---|---|---|---|
| DIY Winterization | $50–$150 | Low cost, full control | Time-consuming, potential mistakes | Experienced RV owners |
| Professional Service | $150–$500 | Expert care, guaranteed | Higher cost, appointment needed | Busy owners, first-timers |
| Partial Winterization | $50–$200 | Saves time, target areas only | May miss critical systems | Mild climates |
Example: A professional winterization saved one owner $400 in repairs compared to a DIY attempt that missed a pipe in the back bay.
FAQs About How to Winterize a RV Travel Trailer
1. How often should I winterize my RV?
Annually, before the first freeze. Even mild climates can experience sudden cold snaps.
2. Can I winterize my RV without antifreeze?
You can, but it increases the risk of burst pipes and water damage. Antifreeze is the safest option.
3. What happens if I don’t winterize my RV?
Frozen pipes, mold growth, and damaged appliances are common consequences.
4. Is DIY winterization safe for beginners?
Yes, if you follow step-by-step instructions carefully. Start with draining and flushing the water system first.
5. How do I store my RV batteries for winter?
Remove and store in a dry, temperature-controlled location; maintain a partial charge.
6. Can I leave my RV outside all winter?
Yes, but proper covers and maintenance are crucial to prevent water and pest damage.
7. Should I cover my RV with a tarp or fitted cover?
Fitted covers are preferred to avoid moisture buildup and snow damage.
8. How do I de-winterize my RV in spring?
Flush antifreeze from the system, reconnect utilities, and inspect all components for damage.
Common Mistakes When Winterizing a RV Travel Trailer
- Leaving water in tanks/pipes: Leads to burst lines.
- Skipping battery maintenance: Shortens lifespan and reduces reliability.
- Poor sealing of slide-outs/vents: Allows moisture and pests inside.
- Using automotive antifreeze: Toxic and unsafe for potable water systems.
Mini anecdote: A first-time RV owner used automotive antifreeze and had to completely flush the system in spring wasting days of prep.
Pro Tips to Make Winterization Easier
- Always use RV-specific antifreeze.
- Keep a winterization toolkit ready: pump, hoses, insulation, covers.
- Schedule mid-winter checks to catch leaks or pests.
- Leverage forums and expert advice for region-specific tips.
Conclusion: Keep Your RV Safe This Winter
Winterizing your RV travel trailer isn’t just about preventing freeze damage it’s about protecting your investment, saving money, and ensuring peace of mind. By following the guide, using proper materials, and avoiding common mistakes recommended by experts like Privacy RV, you’ll extend the life of your RV for years to come.